You can fix peeling clear coat on your car with some patience and the right tools. Sunlight, tree sap, harsh chemicals, and acid rain often cause the clear coat to break down and peel. Start by cleaning the damaged area well. Sand the edges smooth, mask off what you do not want to spray, and apply fresh clear coat. Use quality products for the best finish. If you take your time, you can restore your car’s shine at home.
Spot peeling clear coat early. Watch for dull spots, rough areas, or edges that lift. This helps you fix problems before they get worse.
Get all the supplies you need first. Use good clear coat, primer, sandpaper, and safety gear. This helps your repair work well.
Fix the clear coat step by step. Clean the area, sand it, put on primer, then add clear coat. This makes the finish smooth and strong.
Do not make mistakes like using strong cleaners or skipping cleaning. Getting ready the right way gives better results and lasts longer.
Take care of your car’s finish by washing and waxing often. These habits stop peeling and keep your car looking nice.
Clear Coat Supplies and Prep
Essential Materials and Tools
Before you start fixing a peeling clear coat, you need the right supplies. Having the best tools and products makes the job easier and helps you get a smooth finish. Here’s what you should gather:
Clear coat: Choose a high-quality clear coat for cars. At Guangde dulux Paint Industry Co.Ltd., we offer options like 2K Acrylic High Grade Yellow Resistant Varnish, Quick Dry Clear Coat, Ultra Dry Varnish, High Gloss Varnish, Diamond Varnish, and Eco-friendly Varnish. These products protect your car and keep it looking shiny.
Hardener: This helps the clear coat cure and last longer.
Automotive primer: You may need epoxy primer, white primer, or grey primer to prepare the surface.
High-quality thinner: This makes the clear coat spray evenly.
Sandpaper: Use different grits to smooth out the peeling clear coat and blend the edges.
Masking tape and paper: These keep paint off areas you do not want to spray.
Professional repair kits: These kits often include everything you need for small jobs.
Tip: Using a trusted clear coat and primer from our product line gives you better protection against sun, rain, and scratches. Our clear coat products are made to handle tough weather and keep your car’s finish strong.
Safety and Workspace Setup
Working with clear coat products means you need to stay safe. Always set up your workspace before you begin. Here are some important steps:
Wear gloves to protect your hands.
Use a respirator so you do not breathe in fumes.
Put on safety glasses to shield your eyes.
Consider a paint suit and socks for full-body coverage.
Keep a first aid kit nearby in case of accidents.
You should work in a well-ventilated area. Open windows or use fans to move air. Clean up spills right away and store all clear coat products safely.
Automotive clear coat faces high heat and strong sunlight. Over time, UV rays can make the clear coat lose some gloss and hardness. That is why picking a durable clear coat matters for long-lasting results.
Environmental Concern | Description |
Chemical Residue | Improper application or disposal of clear coat can cause pollution and harm local ecosystems. |
By choosing the right clear coat and following safety steps, you can fix peeling clear coat and help protect both your car and the environment.
Identifying Failing Clear Coat
![Identifying Failing Clear Coat]()
Signs of Peeling and Damage
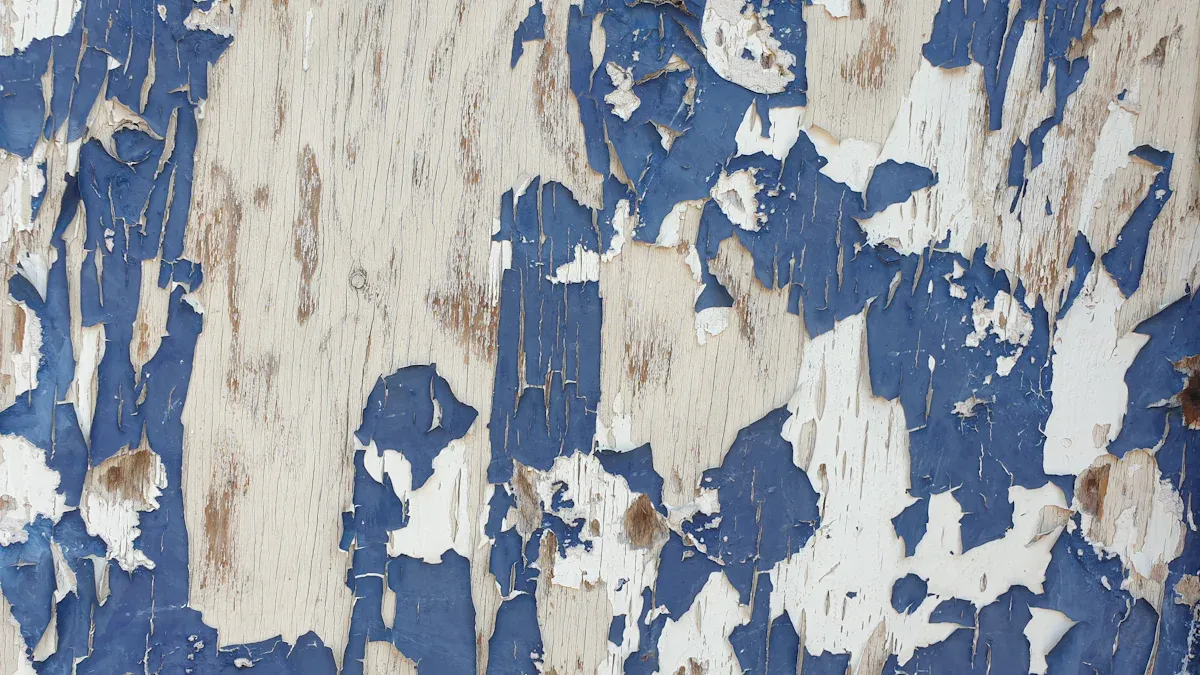
You might notice your car’s finish looks dull or patchy. Sometimes, you see white or gray spots where the shine has faded. If you run your hand over the surface, it may feel rough or flaky. These are classic signs of failing clear coat. When the clear coat starts to peel, you often see edges lifting up or small bubbles forming. Over time, these spots grow bigger and expose the paint underneath.
Environmental factors can speed up this process. Here are some things that can damage your clear coat:
Moisture can cause rust and corrosion, especially on the lower parts of your car.
Bird droppings have acids that eat away at the finish if you leave them too long.
Tree sap sticks to the surface and stains the paint.
Dust and sand scratch the clear coat and make it look dull.
If you spot any of these problems, you are likely dealing with a failing clear coat. Catching it early makes the repair much easier.
Difference from Other Paint Issues
Not every paint problem means you have a failing clear coat. Sometimes, scratches only affect the top layer and do not go deep. Fading or chalky paint can happen when the color coat breaks down, but the clear coat stays intact. If you see rust, that usually means the clear coat and paint have both worn away, exposing bare metal.
You can fix a peeling clear coat at home if the damage is small and only affects the surface. If you see large areas peeling or deep cracks, you might need professional help. A pro can handle bigger jobs and make sure the finish matches the rest of your car.
Tip: Always check the size and depth of the damage before you start. Small spots of failing clear coat respond well to DIY repair, but bigger problems need expert care.
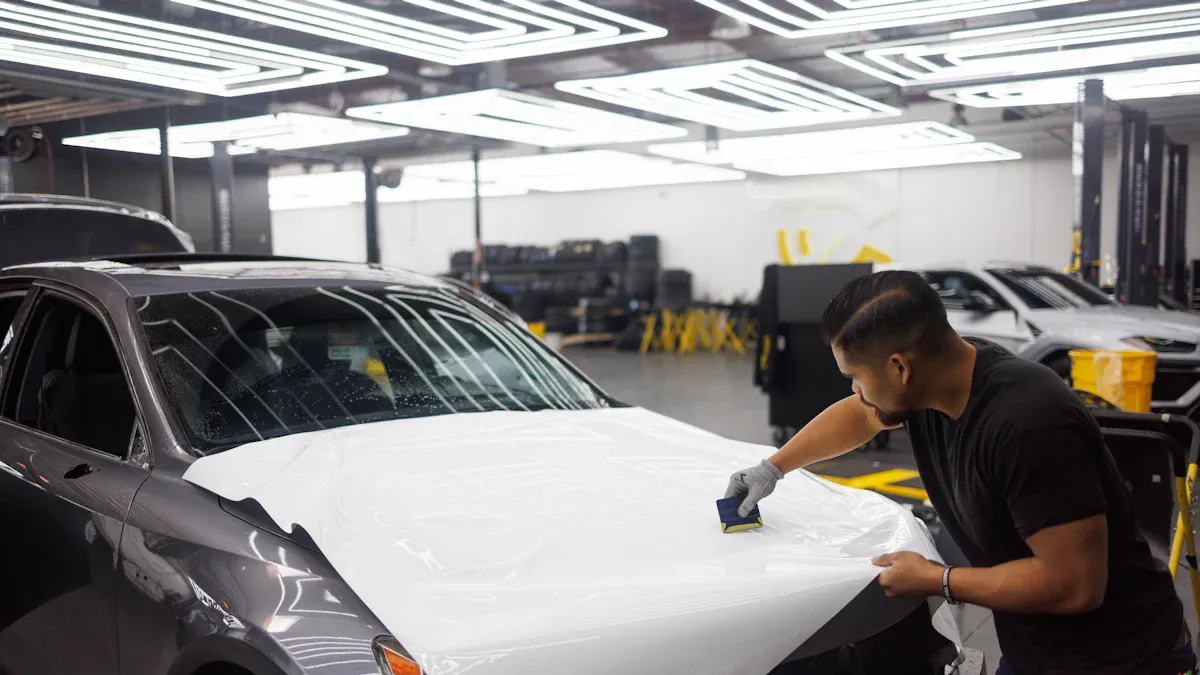
How to Fix Peeling Clear Coat: Steps
![How to Fix Peeling Clear Coat: Steps]()
Cleaning and Masking
You want to start with a spotless surface. Dirt, dust, and old wax can ruin your repair. Begin by rinsing the area with water. Use a foam pre-wash, like HyperClean Foam Wash, to lift dirt without scratching your car. If your car has heavy grime, a heavy-duty pre-wash works best. This step helps you avoid trapping any contaminants under the new clear coat.
After washing, dry the area with a clean microfiber towel. Next, mask off the sections you do not want to spray. Use automotive masking tape and paper. Cover headlights, trim, and any nearby panels. This keeps your repair neat and protects the rest of your car.
Tip: Take your time with masking. A careful job now saves you from extra cleanup later.
Sanding and Feathering Edges
Now, you need to smooth out the peeling clear coat. Sanding helps the new clear coat stick and blends the repair into the old finish. Start with 600 grit sandpaper. This grit works well for feathering the edges of peeling clear coat. It creates a smooth transition without damaging the paint underneath.
Hold the sandpaper flat and use light pressure. Sand just past the peeling edges. You want the surface to feel even and dull, not shiny. Wipe away dust with a tack cloth or a lint-free cloth. This step is key for a seamless look.
Applying Primer and Clear Coat
Once the area feels smooth, check for any dents or scratches. Fill these in before you move on. Choose a high-quality automotive primer that matches your paint system. Spray thin, even coats. Let each coat dry fully before adding another. This helps the primer bond well and prevents runs.
Here’s a simple process to follow for the best results:
Repair dents and imperfections before priming.
Apply thin, even coats of primer. Let each layer dry completely.
Clean the primed area to remove dust.
Sand the surface with 600–800 grit sandpaper for a smooth finish.
Wipe down with a tack cloth to remove residue.
Spray thin, even coats of clear coat. Use an HVLP spray gun or a high-quality brush.
Allow each coat to dry before adding the next.
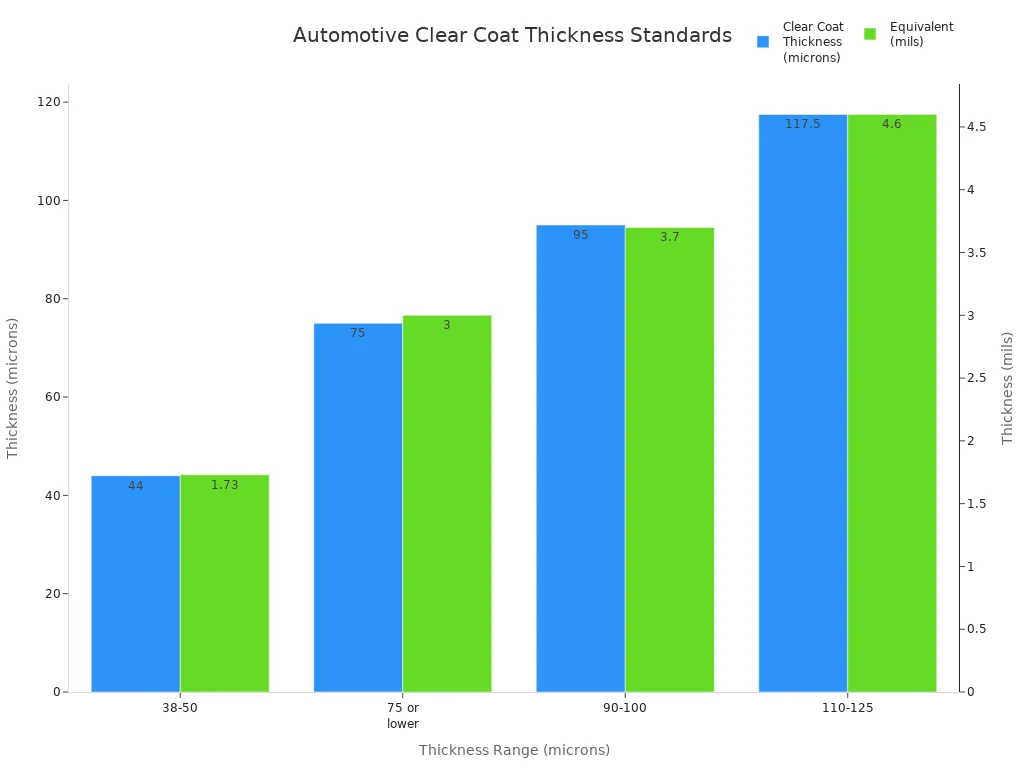
When you spray the clear coat, aim for a thickness between 38 and 50 microns. This matches the standard for most modern vehicles and gives you a durable, glossy finish.
Clear Coat Thickness Range (microns) | Equivalent (mils) | Notes |
38-50 | 1.49-1.97 | Typical range for modern cars |
90-100 | 3.5-3.9 | For detailing |
110-125 | 4.3-4.9 | Good for normal detailing |
75 or lower | 3 or lower | Avoid major correction |
![Bar chart comparing clear coat thickness ranges in microns and mils for automotive refinishing]()
Note: Dulux clear coat products, like 2K Acrylic High Grade Yellow Resistant Varnish, are designed for easy application and long-lasting shine. If you use a professional repair kit, follow the instructions for best results.
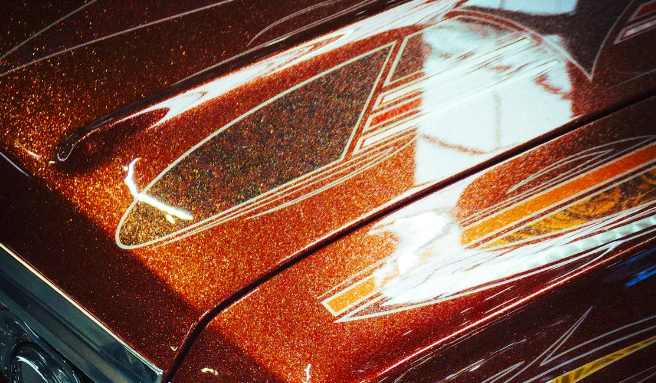
Blending and Polishing
After the clear coat dries, you want the repair to blend in with the rest of your car. Use fine sandpaper, like P1200 or P1500, to smooth out any dust or uneven spots. Wet sanding works best for this step. Keep the surface wet and sand gently.
Next, polish the area with a coarse wax. This removes sanding marks and brings out the shine. Finish with a polishing wax for extra gloss and protection. If you want your car to look like new, take your time with this step.
Pro Tip: If you see a clear difference between the new and old clear coat, keep polishing until the transition disappears. Patience pays off!
You now know how to fix peeling clear coat at home. With the right products and careful steps, you can restore your car’s finish and protect it from future damage. If you ever feel unsure, Dulux offers technical support and trusted products to help you succeed.
Prevention and Common Mistakes
Avoiding Errors
You want your clear coat repair to last and look great. Many people make simple mistakes that lead to problems like peeling clear coat or uneven finishes. Here are some common errors you should avoid:
Using the wrong cleaning products. Dish soap and harsh cleaners can damage the clear coat. Always use pH-balanced shampoos made for cars.
Washing in circles. This can leave swirl marks on your paint. Wash in straight lines to keep the surface smooth.
Skipping the cleaning step. Dirt and wax left behind can cause clear coat failure. Clean the area well before you start.
Poor sanding. If you do not feather the edges or use the right grit, the new clear coat will not blend. Take your time with sanding.
Rushing the drying process. Each layer needs time to dry. If you rush, you might see bubbles or a cloudy finish.
Ignoring small chips or scratches. These can grow and lead to bigger problems. Fix them early to prevent further damage.
Tip: Always check your work between steps. A little extra care now saves you from redoing the job later.
Long-Term Care Tips
After you repair the clear coat, you want to keep it looking fresh. Good habits help prevent issues like oxidised clear coat or new damage. Here are some easy ways to protect your car’s finish:
Wash your car often. Regular washing removes dirt and chemicals that can cause clear coat failure.
Use automotive-specific cleaning products. Avoid harsh chemicals that can strip away protection.
Wax your car every 3-6 months. Wax adds a shield against UV rays and helps stop what causes peeling clear coat.
Get professional detailing once in a while. Experts can spot early signs of damage and keep your clear coat in top shape.
Park in the shade when you can. Sunlight speeds up damage and can lead to oxidised clear coat.
If you follow these tips, you will keep your car’s finish glossy and strong. Taking care of your clear coat means you will not have to worry about peeling or fading for a long time.
You can fix peeling clear coat if you follow each step with care. Here’s a quick recap:
Feather the edges and sand down the surface.
Clean the area with wax remover and isopropyl alcohol.
Apply primer, then a light coat of paint.
Wet sand and polish for a smooth finish.
Remember, using quality products and the right tools makes a big difference. If you need help, many brands offer technical support and easy-to-use repair kits. Keep up with regular care to protect your car’s clear coat for years to come!
FAQ
What causes clear coat to peel on cars?
Clear coat peels because of sun, acid rain, bird droppings, or harsh chemicals. If you wash your car with strong cleaners or leave it outside often, you might see peeling sooner.
Can I fix peeling clear coat myself?
Yes, you can repair clear coat at home. You need sandpaper, primer, clear coat, and masking tape. Follow each step carefully for the best results.
How long does clear coat repair last?
If you use quality products and follow the steps, your repair can last for years. Regular washing and waxing help keep the clear coat strong.
Do I need to sand all the old clear coat off?
You only need to sand the damaged area and feather the edges. Leave the good clear coat alone. This helps the new clear coat blend in.
What clear coat products work best for DIY repair?
Choose a high-quality automotive clear coat. Dulux offers options like 2K Acrylic High Grade Yellow Resistant Varnish and High Gloss Varnish. These give you a durable, shiny finish.
Tip: Always read the instructions on your clear coat product before you start your repair!
Product Name | Type | Benefit |
2K Acrylic High Grade Varnish | Clear Coat | Long-lasting shine |
Quick Dry Clear Coat | Clear Coat | Fast drying |
High Gloss Varnish | Clear Coat | Extra gloss |