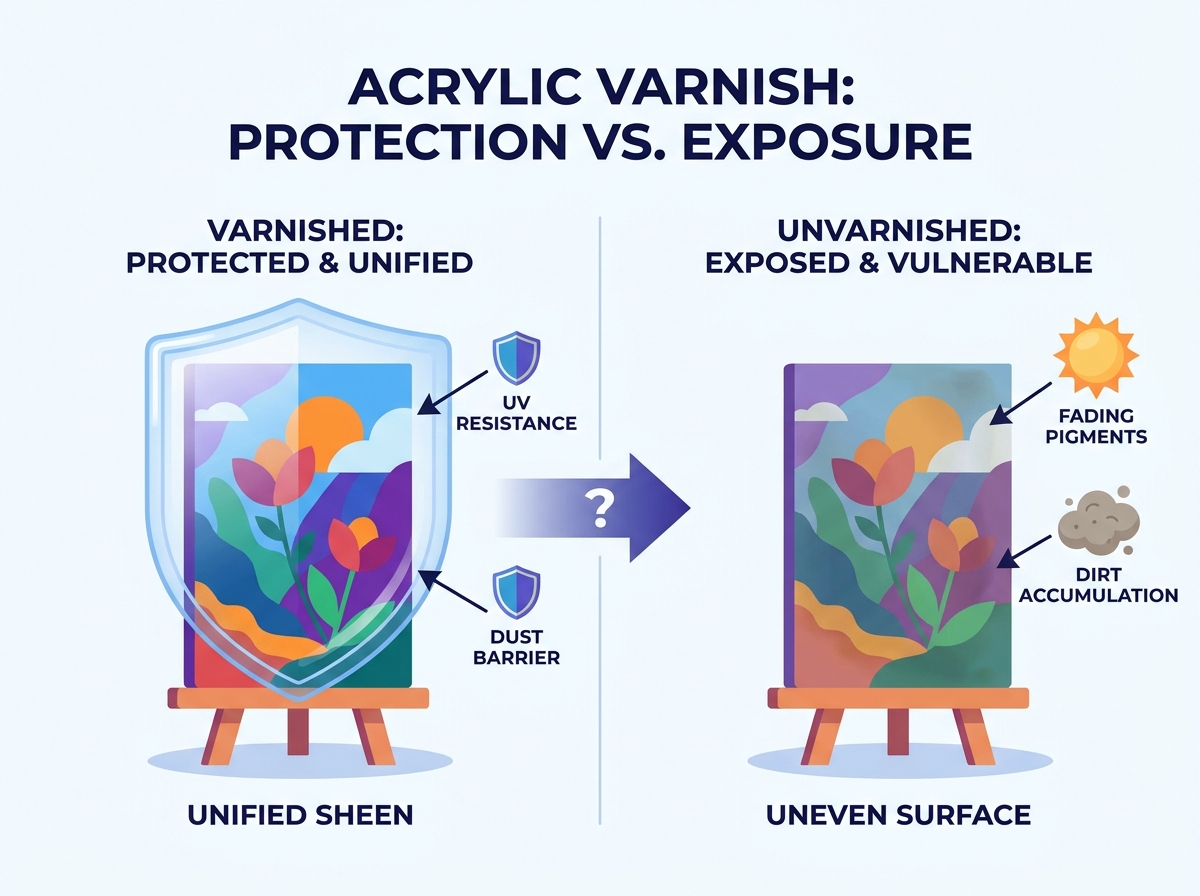
You just spent weeks perfecting a vibrant painting or a highly detailed scale model. Now comes the moment of truth. Should you apply a final topcoat, or will it ruin the entire piece? Many creators hesitate to apply a final coat over finished projects. They fear disastrous results like severe clouding, visible brushstrokes, or long-term yellowing. Fundamentally, an Acrylic varnish is a removable or permanent protective polymer layer designed to safeguard your work against environmental damage. Making the wrong choice at this final stage can compromise months of meticulous labor.
In this comprehensive guide, we will objectively evaluate when sealing your artwork is strictly necessary. We will explore specific display situations where you can safely skip the varnishing process entirely. You will also learn how to weigh traditional finishes against alternative mediums to ensure your next project remains protected, vibrant, and visually unified.
Key Takeaways
- Protection vs. Aesthetics: Varnish serves a dual purpose—sealing the porous acrylic surface from dust/UV light and unifying uneven surface sheens.
- It is not universally mandatory: Projects kept under UV-protective glass or short-term decorative pieces can often skip the varnishing process.
- Context dictates the product: Fine art canvas requires different varnish formulations and applications (e.g., isolation coats) compared to 3D scale models or miniatures.
- Execution is the main point of failure: Most varnishing disasters stem from environmental factors (humidity) or inadequate paint curing times, not the product itself.
1. The Functional Case for Acrylic Varnish (Features to Outcomes)
Understanding the chemical and physical changes your artwork undergoes as it dries helps clarify why topcoats matter. A protective layer offers four distinct advantages that directly impact the longevity of your piece.
Porosity and Environmental Contaminants
Acrylic paint dries quickly through the evaporation of water. However, this evaporation leaves behind a microscopically porous surface. These tiny pores easily trap environmental contaminants over time. Airborne dust, fireplace smoke, and natural household pollutants embed themselves deeply into the unprotected paint layer. Applying a high-quality topcoat creates a solid, non-porous barrier. You can confidently wipe this smooth barrier clean with a damp cloth years later without disturbing the underlying pigment.
Sheen Unification
Different pigments contain varying ratios of binder to solid material. Because of this, certain colors dry inherently glossier or flatter than others. For example, burnt umber might dry chalky, while phthalo blue often dries with a shiny, plastic-like finish. A final coat levels the optical reflection across the entire canvas. This sheen unification pulls the visual composition together, eliminating distracting glossy patches and restoring color depth.
UV Resistance and Lightfastness
Direct sunlight poses a severe threat to vivid artwork. High-quality varnishes incorporate UV Light Stabilizers (UVLS). These specialized chemical agents act like sunscreen for your painting. They absorb or scatter harmful ultraviolet radiation before it reaches the pigment layer. This chemical intervention significantly mitigates color fading and helps maintain vibrancy for decades.
Handling Protection
Tactile objects face entirely different threats than framed canvases. Scale models, tabletop miniatures, and interactive art pieces encounter frequent physical handling. Human skin produces natural oils and gentle acids. Frequent contact transfers these oils directly onto the surface, which rapidly degrades raw paint layers. A robust polymer shield prevents this chemical degradation and adds mechanical resistance against minor scratches.
2. When Can You Safely Skip Varnishing?
Despite its many benefits, applying a final polymer coat is not a strict rule. Certain display conditions and specific artistic intentions make the process entirely redundant. Consider skipping the topcoat in the following scenarios.
Archival Framing
If you plan to mount the piece behind UV-filtering museum glass, the glass itself provides superior protection. The glass effectively blocks ultraviolet radiation and repels household dust. However, you must use appropriate framing spacers. The protective glass should never physically touch the raw paint surface, as trapped condensation can cause the acrylic emulsion to stick to the glass permanently.
High-Lightfastness Pigments in Controlled Environments
Professional artists often work exclusively with ASTM I-rated paints. The American Society for Testing and Materials categorizes these pigments as having excellent lightfastness. If you display works created entirely with these premium paints in controlled environments away from direct sunlight, the risk of fading drops to near zero. Climate-controlled rooms with stable humidity negate the most pressing reasons to apply a UV-resistant topcoat.
Practice Pieces and Sketchbooks
Curing and sealing take substantial time and money. You must wait weeks for the paint to cure before applying anything over it. If the financial cost and time investment outlast the intended lifespan of the project, skip it entirely. Color studies, rapid sketches, and sketchbook pages rarely require archival protection. Furthermore, varnishing sketchbook pages often causes them to stick together.
Intentional Raw Aesthetics
Some modern mediums produce a highly specific texture. Gouache-acrylic hybrids, for instance, dry with a beautiful matte, chalky finish. This delicate texture often forms an integral part of the piece's aesthetic identity. Even the flattest matte topcoat alters this delicate visual quality slightly. When the raw, untreated texture is the primary focus of the artwork, applying any polymer layer ruins the intended visual effect.
![Acrylic varnish application and alternatives]()
3. Evaluating Alternatives to Traditional Acrylic Varnish
Creators frequently experiment with alternative finishes to achieve unique textures or extreme durability. These alternatives offer distinct visual benefits but often introduce complex application challenges. It helps to understand the trade-offs before pouring an unconventional medium over your finished project.
Alternative Finishes Comparison Chart
| Alternative Medium | Primary Pros | Primary Cons |
| Epoxy Resin | Creates an ultra-thick, glass-like finish. Provides extreme physical durability and impact resistance. | Very heavy. Completely permanent. Prone to yellowing over time if poorly formulated. Highly toxic during the pouring phase. |
| Pouring / Fluid Mediums | Easy to brush or pour. Self-leveling properties smooth out brushstrokes. Unifies gloss effortlessly. | Lacks essential UVLS protection against fading. Entirely permanent and cannot be removed for future archival cleaning. |
| Wax Mediums (Cold Wax) | Delivers a highly controllable, velvety matte finish. Highly water-resistant once fully buffed. | Susceptible to heat damage. Attracts dust more aggressively than hard polymers. Requires manual buffing to achieve the correct sheen. |
When selecting an alternative, always consider the long-term display environment. Cold wax feels wonderful to the touch but fails entirely in hot, unventilated rooms. Conversely, epoxy resin survives severe impacts but traps off-gassing bubbles if you pour it improperly.
4. Canvas vs. Scale Models: Adapting to the Application Context
The surface material dictates your overall approach. Fine art canvas requires vastly different preservation protocols compared to rigid 3D models. Tailoring your application method to the specific medium ensures optimal protection without compromising intricate details.
Fine Art (Canvas/Board)
Fine art preservation focuses heavily on archival reversibility. Standard protocol requires applying an "isolation coat" before the final topcoat. An isolation coat is a permanent, clear medium layer that sits directly above your paint. You then apply the removable topcoat over this clear layer. Decades later, conservators can safely strip the dirty topcoat away using mild solvents. Because the isolation coat protects the paint, the original brushstrokes remain entirely untouched.
For application, artists typically prefer a soft, wide synthetic brush. Brushing allows for deep penetration into heavy impasto textures. For massive, flat canvases, specialized low-pressure spray equipment provides a flawless, self-leveling finish without disturbing underlying layers.
Scale Models and Miniatures
Miniature painters face entirely different challenges. They rarely use isolation coats. Their primary focus remains preventing paint chips resulting from constant physical handling during tabletop games. Building up thick layers of protection ruins the micro-details sculpted into the plastic or resin.
Airbrushing or using rattle-can sprays remains the preferred method for 3D objects. Spraying prevents liquids from pooling in deep recesses and obscuring fine details. Modelers often apply a high-gloss coat first. This hyper-smooth surface allows water-slide decals to adhere perfectly without silvering. After the decals set, they apply a final, ultra-matte coat to kill the unnatural plastic shine and restore realistic fabric or metal textures.
5. Implementation Risks: Common Points of Failure
Even experienced creators ruin beautiful pieces during the final sealing stage. Most of these heartbreaking disasters stem from poor environmental conditions or rushed timelines rather than defective products. Understanding common failure points helps you avoid them completely.
Frosting / Clouding
Frosting occurs when a clear topcoat dries with a milky, opaque haze. This frustrating issue typically happens when you apply the product in a high-humidity environment. Airborne moisture becomes trapped within the polymer matrix as it attempts to dry. Similarly, applying the coat too thickly creates a skin on the surface, trapping moisture beneath it. Always apply multiple thin layers in a climate-controlled room to avoid frosting.
Re-activation / Smearing
Many people rush the drying phase. They apply the final layer before the underlying paint fully cures. Paint can feel dry to the touch within twenty minutes, but full chemical curing takes one to three weeks. If you apply a topcoat too early, the solvents inside it will re-activate the uncured pigment. This chemical reaction causes the underlying colors to lift and smear into a muddy mess.
Yellowing
Discoloration typically results from using cheap, non-archival products. Hardware store polyurethane provides excellent protection for wooden furniture but turns aggressively yellow when exposed to sunlight. Always invest in artist-grade polymer products designed specifically for fine art. These archival formulas remain optically clear for decades.
Brushstrokes and Bubbles
Mechanical errors during application ruin smooth surfaces. Over-working the wet layer with a stiff brush leaves obvious, permanent streaks. Furthermore, vigorously shaking a matte finish bottle forces air deep into the matting agents. These tiny air pockets transfer to your artwork and dry as visible bubbles. You should always stir matte products gently to incorporate the agents without introducing air.
6. Decision Framework: Selecting and Applying the Right Finish
Choosing the correct product does not have to feel overwhelming. You can determine the ideal solution for any project by following a straightforward, logical framework. Evaluate your needs systematically before purchasing any materials.
- Step 1: Determine Permanence. First, ask yourself if you need a removable archival finish. Museum-quality pieces demand an isolation coat followed by a removable layer. However, if you are sealing a tabletop terrain piece that faces heavy physical abuse, a permanent topcoat offers superior, unyielding protection.
- Step 2: Choose the Format. Next, evaluate the physical shape and texture of your project. Liquid brush-on options perform exceptionally well for heavy impasto paintings or large, flat canvases. Aerosol sprays suit highly textured 3D objects, fragile miniatures, and multimedia pieces perfectly. Sprays ensure you never accidentally knock delicate elements loose with a brush.
- Step 3: Select the Sheen. Finally, choose your optical finish. Gloss finishes deepen dark colors significantly and increase overall saturation. They look brilliant but remain highly reflective. Matte finishes reduce glare dramatically, making them perfect for brightly lit rooms. However, matte products can slightly wash out dark colors due to the white matting agents suspended inside them. Satin offers a highly balanced compromise, providing slight reflection without excessive glare.
Conclusion
Sealing your artwork remains a deeply contextual decision. A protective topcoat is not strictly necessary for every casual sketch or tightly framed project. However, it is highly recommended for any piece intended for long-term public display, commercial sale, or frequent physical handling. The right polymer layer unifies your colors, repels household dust, and deflects harmful UV rays.
Before you commit to your final piece, practice extreme caution. Always test your chosen finish or alternative medium on a dedicated scrap piece first. Paint this scrap piece using the exact same materials, brands, and techniques applied to your main project. Verifying the sheen, chemical compatibility, and application method beforehand ensures you never accidentally ruin months of hard work at the finish line.
FAQ
Q: How long should I wait before applying acrylic varnish?
A: You must wait until the underlying paint fully cures, not just when it feels dry to the touch. While the surface dries quickly, the underlying layers still retain moisture. Generally, you should wait one to three weeks for standard paints. Extremely thick impasto applications may require over a month to cure completely.
Q: Can you paint over acrylic varnish?
A: Painting directly over a sealed piece is risky. The smooth polymer lacks the physical tooth necessary for new paint adhesion. If you used a removable product, strip it off using appropriate solvents first. If the topcoat is permanent, apply a layer of clear gesso to create artificial texture before altering the old piece.
Q: Why did my matte varnish dry cloudy?
A: Cloudy finishes usually result from trapped moisture or unmixed matting agents. High humidity during application prevents proper drying. Additionally, failing to stir the product adequately leaves matting agents clumped together. To mitigate this, control your room's humidity and always stir—never shake—the bottle gently before use.
Q: Do I need an isolation coat?
A: An isolation coat is only necessary if you plan to use a removable topcoat meant for future archival cleaning. This clear, permanent barrier protects the actual painting when conservators strip away the dirty finish decades later. For permanent topcoats or everyday gaming miniatures, you can safely skip this step.