Applying the final coat to an acrylic project is the highest-stakes step in the creative process. You spend countless hours refining your piece. Sealing it properly determines its longevity. The right Acrylic varnish protects against UV damage, dust, and handling while unifying the surface sheen. The wrong choice brings devastating consequences. It can result in irreversible clouding, trapped bubbles, or yellowing. These errors ruin hours of careful work. We wrote this guide to help you prevent these disasters.
This guide breaks down the core formulations, application methods, and substrate requirements. You will learn how to evaluate your specific materials. We explore different environmental demands and budget constraints. You will walk away knowing exactly how to select the optimal protective layer. Proper selection guarantees your artwork remains vibrant, safe, and visually unified for decades.
Key Takeaways
- Formulation matters: Polymer (water-based) varnishes offer low-odor, easy cleanup, while MSA (Mineral Spirit Acrylic) varnishes provide superior UV protection and smoother leveling.
- Application dictates clarity: Aerosol sprays are mandatory for highly textured pieces or mixed media, whereas brush-on liquids offer better control and self-leveling on flat canvases.
- Sheen alters color perception: Gloss varnishes deepen dark tones and increase saturation; matte varnishes reduce glare but carry a risk of "frosting" dark colors due to added matting agents.
- Prep prevents failure: Nearly all archival varnishing requires a dedicated isolation coat to protect the underlying paint during future varnish removal.
Establishing Your Project's Evaluation Criteria
You must define your primary objective before comparing brands or formulations. Every project presents unique challenges. Different substrates and display environments require entirely different performance metrics. A formula designed for rigid canvas will fail on flexible leather. A gallery piece demands different preservation standards than a mural facing direct sunlight. We recommend establishing your criteria early.
Archival Conservation vs. Commercial Durability
Fine art and commercial crafts require distinct protective strategies. Fine art demands archival conservation. Museums and collectors expect paintings to last centuries. Dust and pollutants eventually embed themselves into the top layer. Conservators must strip away the old finish and apply a fresh one. This process requires a removable protective coat. You ensure future restoration by choosing archival products.
Commercial durability prioritizes physical toughness over removability. Custom sneakers, painted leather jackets, and functional crafts face constant kinetic stress. They require extreme flexibility, water resistance, and scuff protection. Standard rigid finishes crack under the strain of walking or bending. You should choose specialized, flexible polymer formulas for wearables. These bend seamlessly alongside the substrate.
Environmental Exposure
You must assess the intended display environment. Direct sunlight degrades pigments rapidly. High UV exposure requires formulas packed with UltraViolet Light Stabilizers (UVLS). These stabilizers act like sunscreen for your art. They absorb harmful radiation and dissipate it safely. Outdoor murals face severe weather conditions. They require heavy-duty, solvent-based protection to block moisture and UV rays. Indoor studio pieces face minimal UV threat. They often require less aggressive protection.
Budget and Scale
Scale dictates your purchasing strategy. Small canvases allow for premium, small-batch sprays. Large murals or mass-produced crafts require cost-effective bulk liquids. High-gloss Acrylic varnish serves as an excellent alternative to expensive epoxy resins. Resins provide a thick, glass-like finish but carry health risks and high costs. You can achieve a similar visual depth by applying multiple layers of a self-leveling acrylic gloss. This approach saves money and eliminates toxic resin fumes.
Evaluation Steps for Your Project:
- Identify the substrate flexibility (rigid canvas vs. soft leather).
- Determine the end user (fine art collector vs. commercial buyer).
- Assess expected sunlight exposure to gauge UVLS needs.
- Calculate the square footage to determine liquid volume requirements.
![Acrylic varnish comparison and application]()
Polymer vs. MSA: Choosing the Right Chemical Base
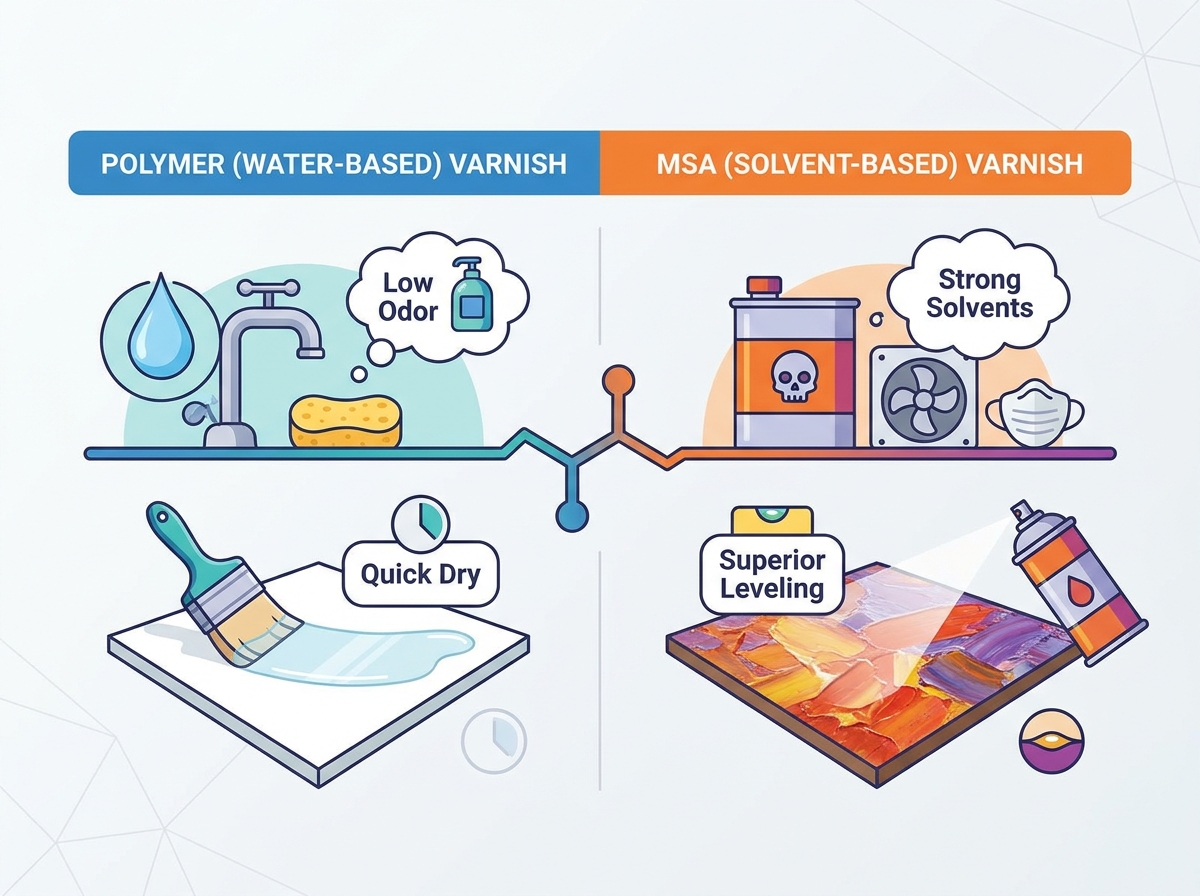
The fundamental technical decision is choosing between water-based and solvent-based chemical structures. This choice shapes your entire workflow. Each base carries distinct performance trade-offs. You must balance studio safety against leveling capabilities. We break down the two primary categories below.
Polymer (Water-Based) Varnishes
Polymer formulas utilize water as their primary vehicle. They are highly popular among home hobbyists and indoor studio artists. They provide excellent protection without severe health risks.
- Pros: They feature a low odor profile. They remain non-toxic during application. You can clean your brushes easily using warm water and mild soap. They dry relatively fast, allowing for multiple coats in a single day.
- Cons: Their water content poses a hidden risk. They can reactivate moisture-sensitive underlayers. An improper isolation coat leads to smudged paint. Furthermore, rapid drying times reduce their ability to self-level. This increases the likelihood of visible brush strokes.
MSA (Solvent-Based) Varnishes
Mineral Spirit Acrylic (MSA) formulas represent the industry standard for professional galleries. They suspend the acrylic polymers in strong solvents instead of water. They deliver unmatched clarity and durability.
- Pros: They boast exceptional self-leveling capabilities. The slower evaporation rate allows brush strokes to melt away seamlessly. They bond firmly to almost any surface. They will never disturb water-soluble paints beneath them. They provide the highest level of optical clarity and UV protection available.
- Cons: The chemical makeup demands respect. You must use strong solvents like mineral spirits for thinning and cleanup. They emit potent Volatile Organic Compounds (VOCs). You must ensure proper ventilation. We strongly recommend wearing a fitted respirator during application. They also require a longer off-gassing period before framing.
Chemical Base Comparison Matrix
| Feature | Polymer (Water-Based) | MSA (Solvent-Based) |
| Odor Profile | Low / Mild | High / Pungent |
| Cleanup Method | Soap and warm water | Mineral spirits / Turpentine |
| Self-Leveling | Moderate | Excellent |
| Drying Time | Fast (1-3 hours to touch) | Slow (12-24 hours to touch) |
| Underlayer Risk | May disturb water-soluble media | Safe for all media types |
Application Methods: Liquid Brush-On vs. Aerosol Spray
The physical texture of your project dictates the best application method. You must apply the Acrylic varnish evenly to prevent pooling. Uneven curing ruins optical clarity. We evaluate the two primary delivery systems to help you match them to your surface.
Brush-On Liquid Varnishes
Liquid formulas applied by brush offer tactile control. They remain the preferred choice for flat canvases, rigid panels, and large-scale murals. You can build up thicker, more durable coats using liquids. They also eliminate the airborne overspray associated with aerosols.
However, brush application carries significant risks. Overworking the liquid causes microscopic air bubbles. Shaking the bottle vigorously before pouring traps air inside the formula. These bubbles cure into the finish, leaving permanent white specks. Always stir your liquids gently. Never shake them. We recommend using wide, soft-bristled synthetic brushes. Work in long, overlapping strokes across the entire canvas.
Best Practices for Brushing:
- Stir gently with a palette knife; never shake the bottle.
- Use a wide, soft synthetic brush dedicated only to topcoats.
- Maintain a wet edge. Never brush back into a partially dry area.
Aerosol Spray Varnishes
Aerosol sprays provide a fine, uniform mist. They are mandatory for impasto techniques and highly textured surfaces. A brush cannot reach into deep crevices without pooling liquid. Aerosols lay down a thin layer perfectly conforming to the texture. They also eliminate physical friction. This makes them ideal for fragile mixed-media pieces or soft pastels.
Aerosols present their own unique challenges. They are highly susceptible to ambient humidity. The rapid cooling of the propellants can draw moisture from the air. This moisture becomes trapped on the surface, causing severe clouding. Aerosols also require precise nozzle control. Holding the can too close causes drips. Moving inconsistently creates a "spotted" finish. Always test your spray distance on scrap material.
Sheen Selection and Its Impact on Color Depth
Selecting a finish is not purely aesthetic. It physically alters how light interacts with the pigments beneath it. Your chosen sheen changes the perceived depth, contrast, and saturation of your artwork. You must match the sheen to your desired visual outcome.
Gloss Varnish
Gloss finishes eliminate light scattering. They create a smooth, reflective surface mirroring glass. This smooth surface allows light to travel directly into the paint layer and bounce back uniformly. As a result, gloss deepens blacks dramatically. It heavily saturates vibrant colors. Gloss brings life back to "sunken" acrylics that dried dull. It is the ideal choice for mimicking the look of poured resin.
Matte Varnish
Matte finishes scatter incoming light to eliminate glare. They provide a soft, non-reflective surface. Artists highly favor matte sheens for brightly lit environments. Pieces photographed frequently require matte finishes to avoid harsh hot spots from studio lights. The surface diffuses light in all directions.
Common Mistake: The Frosting Effect
Matte varnishes contain microscopic white matting agents, usually silica. These particles create the rough texture necessary to scatter light. If you apply a matte formula too thickly over dark colors, the silica particles pool together. They create a cloudy, frosted appearance. Dark blues and blacks turn milky. You can mitigate this risk by applying a gloss layer first. Once the gloss seals the deep colors, you apply a single, thin layer of matte to kill the glare.
Satin Varnish
Satin offers a balanced hybrid. It contains a lower concentration of matting agents than a full matte formula. It scatters enough light to reduce distracting glare. However, it retains enough smoothness to keep colors vibrant. Satin often serves as the safest choice. It maintains the paint's original appearance without extreme glare or severe dulling.
Implementation Risks and Mitigation Strategies
Even the highest-quality products will fail under the wrong conditions. Professional artists plan for operational risks. You must factor these environmental and chemical challenges into your workflow. Proper mitigation separates flawless finishes from ruined masterpieces.
The Isolation Coat Requirement
Never apply a removable topcoat directly onto an acrylic painting. This represents the most common, catastrophic mistake in the studio. You must apply a permanent, non-removable glossy isolation coat first. This coat seals the absorbent paint layers. It creates a physical barrier. Decades later, when a conservator uses strong solvents to strip the dirty topcoat, the isolation coat protects your delicate pigments from the harsh chemicals. Without an isolation coat, removing the finish strips away the actual painting.
Curing vs. Drying Times
You must understand the difference between drying and curing. Acrylic paint may feel dry to the touch in just a few minutes. Water evaporates quickly from the surface. However, the underlying polymer chains can take weeks to cross-link fully. This process is called curing. Varnishing over uncured paint traps evaporating moisture beneath the surface. This leads to catastrophic clouding, known as blooming. You must wait at least 72 hours for thin paint layers. Heavy impasto textures require up to three weeks of curing before sealing.
Managing Environment
Application must occur in a strictly controlled environment. You need a dust-free space. Airborne particles settle rapidly onto sticky surfaces. Humidity poses the greatest threat. You must keep ambient humidity below 70%. High humidity interferes with solvent evaporation. It traps airborne moisture directly inside the finish. Temperature also matters. Aim for a workspace between 65°F and 75°F. Cold temperatures thicken the liquid, causing heavy brush strokes. Hot temperatures cause the liquid to flash-dry before it can self-level properly.
Conclusion
Selecting the correct final coat requires matching chemical properties to your specific substrate and environment. Fine art demands museum-grade, removable protection. Wearable crafts demand flexible, durable barriers. Your application method should align with your surface texture to prevent pooling and bubbles. Controlling your environment ensures proper curing and absolute clarity.
Next Steps:
- Evaluate your project's texture, environment, and archival needs carefully.
- Apply a glossy isolation coat to protect your underlying pigments permanently.
- Choose your sheen based on the desired color saturation and lighting conditions.
- Always test your chosen formula on a scrap piece using the exact paints from your project. Verify compatibility and visual outcome before committing to the final piece.
FAQ
Q: Can I use acrylic varnish as a cheaper alternative to resin?
A: Yes. Multiple coats of a high-gloss, self-leveling liquid acrylic varnish or pouring medium can mimic the thick, glass-like finish of resin at a fraction of the cost, without the toxicity or yellowing risks associated with cheap epoxies.
Q: Why did my acrylic varnish dry cloudy or white?
A: Clouding is typically caused by one of three errors: applying the varnish in high humidity, applying a matte/satin varnish too thickly (pooling the matting agents), or shaking the bottle and trapping microscopic air bubbles in the liquid.
Q: Do I need to varnish acrylic paint on shoes or leather?
A: Yes, but you must use a specialized, flexible polymer acrylic varnish. Standard rigid canvas varnishes will crack under the kinetic stress of walking. Products formulated specifically for leather or wearables ensure the finish bends with the substrate.
Q: How do I fix a bubbly varnish finish?
A: If the varnish is archival and applied over an isolation coat, it can be stripped using the appropriate solvent (ammonia for polymer, mineral spirits for MSA) and reapplied. If no isolation coat was used, the bubbles are permanently trapped.