


Car paint is one of the most important aspects of vehicle aesthetics. Over time, however, your vehicle’s paint can suffer from minor damage like chips, scratches, and fading. Whether you drive a brand-new car or a well-loved classic, touching up automotive paint can restore your vehicle’s look and protect it from the elements. But how exactly do you go about touching up car paint for a smooth, professional-looking finish?
In this guide, we’ll cover everything you need to know about automotive paint touch-ups. From choosing the right car paint to applying it with precision, we’ll walk you through a simple step-by-step process that ensures your car looks as good as new. Whether you're working with black automotive paint, white automotive paint, or even metallic and pearl finishes, this guide will help you achieve a flawless result.
Why Should You Touch Up Your Car Paint?
When your car’s paint gets damaged, it’s important to address it right away. Here are a few reasons why a car paint touch-up is essential:
Prevents rust: Exposed metal from chips or scratches can lead to rust if left untreated.
Maintains the vehicle’s appearance: A touch-up can restore the original look of your car, making it appear well-maintained and fresh.
Boosts resale value: If you plan to sell your vehicle in the future, a well-maintained exterior with no noticeable chips or scratches can increase its resale value.
Cost-effective: Rather than spending hundreds of dollars on a full repaint, a touch-up is an affordable way to fix small imperfections.
Types of Automotive Paint and Their Drying Times
Before you start your touch-up job, it's crucial to know what type of automotive paint you’re working with. Different types of paints and finishes have varying drying times and application methods. Understanding these differences will help you determine how to proceed with your touch-up.
1. Solvent-Based Paints
Solvent-based paints are widely used for automotive finishes. They are durable and provide a glossy, smooth finish. This type of paint generally dries quickly.
Dry to the touch: 1-2 hours
Fully cured: 24-48 hours
This makes solvent-based paints a popular choice for car paint touch-ups, especially for metallic or clear coats.
2. Water-Based Paints
Water-based paints are more eco-friendly and are becoming increasingly popular in the automotive industry. They tend to take a little longer to dry but offer a smoother, more even finish.
Dry to the touch: 2-4 hours
Fully cured: 48-72 hours
While water-based paints dry slower, they offer excellent results, particularly when applied in a well-ventilated area.
3. 1K Paints
1K paints are single-component paints that don’t require a hardener. They are simple to use and great for touch-ups because they dry relatively fast.
Dry to the touch: 1-3 hours
Fully cured: 24-48 hours
1K automotive paints are perfect for small jobs, such as chips or scratches on the car color paint.
4. 2K Paints
2K paints are two-component systems that require mixing with a hardener. These paints offer increased durability and longevity but take longer to dry.
Dry to the touch: 2-4 hours
Fully cured: 48-72 hours
2K automotive paints are ideal for professional-level repairs where strength and durability are crucial.
5. Specialty Paints
Paints like metallic, pearl, and custom colors require extra care. These types of paints often take longer to dry and may need additional layers to match the surrounding paint color.
Dry to the touch: 3-4 hours
Fully cured: 48-72 hours
If your vehicle has a metallic or pearl finish, consider purchasing paint specifically designed for these finishes.
Essential Tools and Materials for Touching Up Automotive Paint
The key to achieving a seamless paint job is using the right tools and materials. Here’s a checklist of what you’ll need for a successful car paint touch-up.
1. Automotive Paint
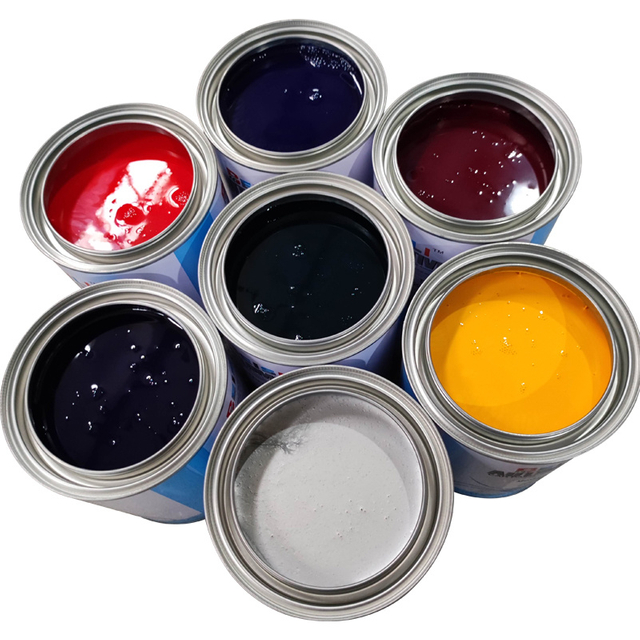
Choosing the right automotive paint is crucial for achieving a professional look. Always match the paint color as closely as possible to the original. Use the car color paint that corresponds with your vehicle’s color code, which you can find on the VIN plate or in your car’s manual. You’ll find various options such as:
Black automotive paint
White automotive paint
Red automotive paint colors
Blue automotive paint
Silver paint
Pearl paint
2. Primer
Applying primer before your topcoat ensures that the paint adheres properly and lasts longer. Primer also smooths out imperfections and helps seal the surface, especially if there’s any rust.
3. Clear Coat
A clear coat provides an added layer of protection for your paint and gives your car a glossy, shiny finish. It’s especially important for metallic and pearl finishes, which benefit from the added depth and shine.
4. Sandpaper
Use fine-grit sandpaper (around 2000-grit) to smooth the edges of the damage before applying paint. Sanding prepares the surface and helps the new paint layer bond well.
5. Paintbrush or Applicator
A small paintbrush or pen applicator is perfect for applying the paint precisely to the damaged area. This ensures you don’t accidentally paint over surrounding areas.
6. Automotive Paint Thinner
If you need to dilute your paint for a smoother finish or to clean your brushes, automotive paint thinner is essential. Using the best thinner for automotive paint will help ensure the paint is the correct consistency.
Step-by-Step Guide to Touching Up Automotive Paint
Now that you have your materials ready, it’s time to start the touch-up paint process. Follow these easy steps for a flawless result.
Step 1: Clean the Damaged Area
Start by thoroughly cleaning the area you plan to touch up. Use soap and water to remove dirt, grease, and grime. Make sure the area is completely dry before moving to the next step.
Step 2: Sand the Damaged Area
Using fine-grit sandpaper, gently sand the damaged area to smooth out the edges of the chip or scratch. Sand in a circular motion to avoid creating uneven spots. Be careful not to sand too deeply, as you may cause further damage.
Step 3: Apply Primer
Next, apply a thin coat of primer to the sanded area. Primer helps the paint adhere better and ensures a smoother finish. Wait for the primer to dry completely (usually about 30 minutes).
Step 4: Apply the Paint
After the primer is dry, apply the car paint to the damaged area. Use a small brush or paint pen for precision. Apply thin layers of paint, waiting for each layer to dry before applying the next. This prevents dripping and uneven coverage.
Allow each layer to dry for 30 minutes to 1 hour before applying the next.
For metallic or pearl paint, apply multiple coats to ensure even coverage and a perfect match.
Step 5: Apply Clear Coat
Once the paint has dried completely, apply a clear coat to protect the paint and give it a glossy finish. Let the clear coat dry for 1 hour. Depending on your preference, you can apply additional coats of clear coat for added protection.
Step 6: Let the Paint Cure
After applying the clear coat, let the paint cure for 24-48 hours before handling the area. This allows the paint to fully harden and ensures long-lasting results.
Tips for a Successful Touch-Up
1. Choose the Right Paint Color
Always use the exact car color paint that matches your vehicle’s original paint. You can find the paint code for your car in the owner’s manual or on the VIN plate.
2. Work in a Well-Ventilated Area
Make sure you’re working in a well-ventilated area to avoid inhaling paint fumes. A garage or outdoor space with proper airflow is ideal.
3. Use Thin Coats
When applying paint, always use thin coats. Thick layers can lead to uneven drying and cause the paint to run or drip.
4. Protect Surrounding Areas
Use painter’s tape or masking paper to protect the surrounding area from accidental paint splatters.
5. Be Patient
Don’t rush the process. Allow each layer of paint and clear coat to dry fully before applying the next. This ensures the best finish and durability.
FAQs
Q1: How do I touch up automotive paint?
A1: To touch up automotive paint, clean the area, sand it smooth, apply primer, and then apply thin coats of paint. Finish with a clear coat to protect the paint.
Q2: Can I touch up automotive paint myself?
A2: Yes, with the right materials and tools, you can easily perform a car paint touch-up on your own. Just be sure to follow the proper steps for the best results.
Q3: How long does it take automotive paint to dry after a touch-up?
A3: Touch-up paint generally dries to the touch in 1-2 hours, but full curing may take 24-48 hours depending on the type of paint and environmental conditions.
Q4: What type of automotive paint should I use for touch-ups?
A4: Use 1K automotive paint for a quick touch-up, or 2K paint for a more durable and long-lasting finish. Match the paint to your car’s original color for the best result.
Q5: How do I match the color of my car’s paint?
A5: Find your car’s color code (usually on the VIN plate) to ensure you choose the correct paint that matches the original color.
Q6: How can I avoid streaks when touching up my car’s paint?
A6: Apply thin layers of paint and allow each coat to dry before applying the next. Use clear coat for a smooth, glossy finish.
Q7: How long does it take to touch up a car’s paint?
A7: The touch-up process can take around 1-2 hours, but for best results, allow the paint to cure for 1-2 days.
Touching up automotive paint is a great way to restore your car’s appearance and maintain its value. By following the step-by-step process outlined in this guide, you can easily fix small chips and scratches yourself. With the right tools, materials, and techniques, you can achieve a professional-looking finish without the high cost of a full repaint.
Whether you’re working with black automotive paint, metallic paint, or any other color, a little patience and attention to detail will result in a flawless touch-up that makes your car look like new. Remember to use the best automotive paint, apply thin coats, and allow enough drying time for optimal results.


