Mixing automotive paint is a skill that requires precision, knowledge, and the right tools to achieve professional-level results. Whether you are restoring an old car, customizing a new vehicle, or doing minor touch-ups, mixing automotive paint correctly is crucial for a smooth, durable finish. This article will guide you through the process of mixing automotive paint, explain the components involved, and provide you with expert tips for achieving a flawless paint job.
Understanding Automotive Paint
Before diving into the specifics of how to mix automotive paint, it's important to understand the components and types of automotive paints used in the industry today. Automotive paints are different from standard paints due to the need for durability, weather resistance, and smooth finishes.
Types of Automotive Paint
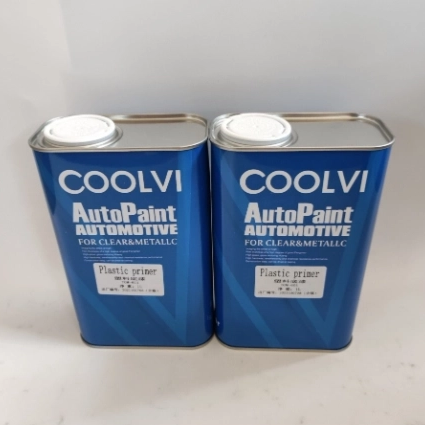
Automotive paint comes in a variety of types, and each has its distinct properties that make it suitable for different purposes. The most common types of automotive paint include acrylic lacquer, acrylic enamel, polyurethane, and base coat/clear coat systems. Each of these has unique benefits and applications. Acrylic lacquer is known for its high gloss finish and quick drying time, though it can fade with UV exposure. Acrylic enamel is more durable and provides long-lasting results, making it ideal for automotive restoration projects. Polyurethane, often used in high-end finishes, offers excellent resistance to chemicals, abrasion, and UV light. The base coat/clear coat system, now the industry standard, involves applying a colored base coat followed by a protective clear coat, offering a durable and glossy finish.
Components of Automotive Paint
Automotive paint typically consists of three main components: pigment, resin, and solvent. Pigment provides the color to the paint, coming in a wide range of hues and shades. Resin binds the paint, allowing it to adhere to the vehicle’s surface and providing durability. Solvents, on the other hand, thin the paint, making it easier to apply and ensuring smooth coverage. When mixed properly, these components create a paint that is not only aesthetically pleasing but also durable enough to withstand environmental conditions.

Preparing to Mix Automotive Paint
Proper preparation is essential to ensure a professional and long-lasting finish when mixing automotive paint. The right tools and a well-organized workspace can make the process much easier and more efficient.
Tools and Equipment
To mix automotive paint correctly, you need specific tools and equipment. Paint mixing cups are essential for measuring the paint, hardener, and thinner accurately. These cups often have markings for easy ratio measurement. Paint stir sticks are used to mix the paint thoroughly, ensuring that all components blend evenly. A spray gun is needed for applying the paint evenly across the vehicle's surface. It's crucial to use a spray gun that is compatible with the type of paint you are using. Safety gear is also a must. When mixing and applying automotive paint, always wear gloves, a respirator mask, and goggles to protect yourself from harmful chemicals and fumes.
Setting Up the Work Area
Ensure that your work area is clean, organized, and well-ventilated. Automotive paint contains chemicals that can be harmful if inhaled, so good ventilation is crucial. Choose a dust-free environment, as even the smallest dust particles can interfere with the quality of your paint job. Having a designated area for mixing and applying the paint will help keep things organized and reduce the chance of contamination.
How to Mix Automotive Paint
The process of mixing automotive paint is relatively straightforward but requires careful attention to detail. By following the correct steps and using the right tools, you can achieve a professional finish.
Step 1: Choose the Right Paint
The first step is to select the right automotive paint. Depending on your project, you may need a specific type of paint, such as acrylic, enamel, or polyurethane. The paint you choose should match the desired finish and provide the necessary durability for the conditions the vehicle will be exposed to. Always check the manufacturer’s guidelines for the best type of paint for your project.
Step 2: Measure the Paint, Hardener, and Thinner
Accurate measurement is critical when mixing automotive paint. Typically, automotive paint is mixed in a ratio of 4:1:1 or 4:1:2—four parts paint, one part hardener, and one or two parts thinner. This ratio may vary depending on the specific paint type, so always follow the manufacturer’s instructions. Use a paint mixing cup to measure each component precisely. Most mixing cups are graduated, allowing you to measure the exact amount needed.
Step 3: Mix the Components Thoroughly
Once the paint, hardener, and thinner are measured, pour them into a clean mixing cup. Use a stir stick to mix the components together thoroughly. Stir for at least 2 to 3 minutes to ensure that the paint, hardener, and thinner are well blended. This step is crucial, as inadequate mixing can result in an uneven application and poor adhesion to the surface.
Step 4: Strain the Paint
After mixing, it’s important to strain the paint before applying it. Straining removes any debris or clumps that may have formed during mixing. Even small impurities can ruin the finish, so using a fine mesh strainer to filter the paint is a necessary step in ensuring a smooth, clean application.
Step 5: Test the Paint
Before applying the paint to your vehicle, it’s a good idea to test it on a small, inconspicuous area or a test panel. This will allow you to check the color, consistency, and finish of the paint before using it on the entire vehicle. If the paint is too thick or too thin, adjust the mixture by adding more paint or thinner as necessary.
Step 6: Apply the Paint
Once you’re satisfied with the paint mixture, load it into the spray gun and begin applying it to the vehicle. Start with light, even coats and allow each coat to dry before applying the next one. Most automotive paints require several coats to achieve the desired finish. Be sure to apply the paint in a well-ventilated area to ensure that it dries properly.
Step 7: Clear Coat Application (If Applicable)
For base coat/clear coat systems, once the base coat is applied and has dried, you should apply a clear coat to protect the paint and provide a glossy finish. The clear coat acts as a protective barrier, guarding the paint against environmental factors such as UV rays, chemicals, and scratches. Follow the manufacturer’s instructions regarding the drying time and application of the clear coat to ensure a flawless finish.
Factors to Consider When Mixing Automotive Paint
While mixing automotive paint is a straightforward process, there are several factors that can affect the final result. These include environmental conditions, paint consistency, and drying time.
Temperature and Humidity
The temperature and humidity levels in your workspace can greatly affect the paint’s application and drying process. Ideal temperatures for mixing and spraying automotive paint range from 60°F to 80°F (15°C to 27°C). If the temperature is too low, the paint may take longer to dry and could result in a poor finish. High humidity can cause the paint to become too thick, leading to poor adhesion and an uneven surface. It's important to work in an environment that offers the proper conditions for paint application.
Consistency
The consistency of the automotive paint is crucial to achieving a smooth, even application. If the paint is too thick, it may not spray properly, leading to uneven coverage and visible brush marks. If the paint is too thin, it may run or drip, ruining the finish. Achieving the right balance of paint, hardener, and thinner is key to ensuring a professional result.
Drying Time
Drying time is another critical factor when mixing and applying automotive paint. Each layer of paint requires adequate time to dry before applying the next coat. Generally, you should wait 15-30 minutes between coats, depending on the type of paint and environmental conditions. The clear coat may require more time to fully cure, so allow sufficient time for the paint to dry before handling or exposing the vehicle to outdoor elements.
Conclusion: The Role of Guangde Dulux Paint Industry in Automotive Paint
Mixing automotive paint may seem like a simple task, but it requires precision, the right tools, and an understanding of the materials involved. By following the steps outlined above and considering the key factors, you can achieve a professional-quality finish for your vehicle.
Guangde Dulux Paint Industry is a leading supplier of high-quality automotive paints designed to provide excellent color matching, durability, and resistance to environmental factors. Their products, including acrylic, enamel, and polyurethane paints, ensure that you achieve the best possible results for your automotive painting projects. With Guangde Dulux Paint Industry’s commitment to innovation and quality, automotive painting becomes an easier and more enjoyable process.


